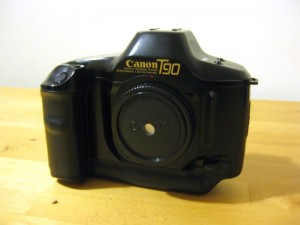
I have made and used a few pinhole cameras that used photo paper as “film” but I wanted to try m hand at using real, negative film. Recently, someone gave me a 35mm film developing jar and so I decided now was the time to try my hand at negative film. I have several old Canon 35mm SLR cameras which all take FD lenses so I decided to make a pinhole “lens” for them.
Technically, pinhole photography is lens-less but the “lens” I made is made from a body cap that can be taken off and replaced just like a conventional lens. The camera body is not altered in anyway with this conversion.
In a previous project, I discuss how to make pinholes in small pieces of aluminum from pop cans so I won’t discuss that here. You can read the original article here. Canon’s FD mount has a 42.1mm lens to film distance and given that 35mm film has a frame size of 24x36mm, I calculated that I needed a pinhole with diameter of 0.271mm using MrPinhole.com. This, in turn, results in an f/152 for this setup. Here is an exposure guide for f/153 that I calculated on MrPinhole.com:
| f 2.8 | f 8 | f 16 | f 153 |
| 1/128000 s | 1/16000 s | 1/4000 s | 1/60 s |
| 1/64000 s | 1/8000 s | 1/2000 s | 1/30 s |
| 1/32000 s | 1/4000 s | 1/1000 s | 1/15 s |
| 1/16000 s | 1/2000 s | 1/500 s | 1/8 s |
| 1/8000 s | 1/1000 s | 1/250 s | 1/4 s |
| 1/4000 s | 1/500 s | 1/125 s | 1/2 s |
| 1/2000 s | 1/250 s | 1/60 s | 1 s |
| 1/1000 s | 1/125 s | 1/30 s | 3 s |
| 1/500 s | 1/60 s | 1/15 s | 6 s |
| 1/250 s | 1/30 s | 1/8 s | 12 s |
| 1/125 s | 1/15 s | 1/4 s | 23 s |
| 1/60 s | 1/8 s | 1/2 s | 47 s |
| 1/30 s | 1/4 s | 1 s | 2 m 33 s |
| 1/15 s | 1/2 s | 2 s | 3 m 6 s |
| 1/8 s | 1 s | 4 s | 6 m 13 s |
| 1/4 s | 2 s | 8 s | 12 m 26 s |
| 1/2 s | 4 s | 16 s | 25 m 52 s |
| 1 s | 8 s | 33 s | 50 m 45 s |
| 2 s | 16 s | 1 m 5 s | 2 h 40 m |
| 4 s | 33 s | 2 m 10 s | 3 h 19 m |
| 8 s | 1 m 5 s | 4 m 21 s | 7 h 38 m |
| 16 s | 2 m 10 s | 9 m 42 s | 13 h 16 m |
| 32 s | 4 m 21 s | 17 m 24 s | 27 h 32 m |
| 1 m 4 s | 9 m 42 s | 35 m 49 s | 53 h 5 m |
| 2 m 8 s | 17 m 24 s | 1 h 10 m | 106 h 10 m |
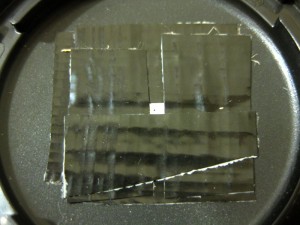
Once you have made a pinhole of suitable size in a piece of aluminum, it is quite easy to make the “lens.” First, take a FD mount body cap and find the center. The body cap I used was concave on the inside so I placed it outside down on a table and place a small, metal ball bearing inside the concave cup. In this way, I let gravity find the center of the cap for me. I then marked around the ball bearing to find the center. Then, I drilled a hole through the cap. The size of the hole doesn’t really matter as long as the hole is smaller than your piece of aluminum. If your hole is too small, it might be possible to get the edge of the hole in the shot when taking a picture. I think the hole I made was about 3/8″.
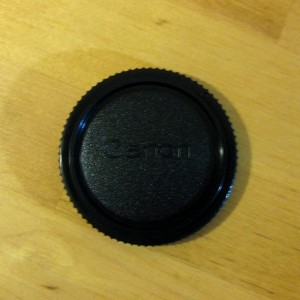
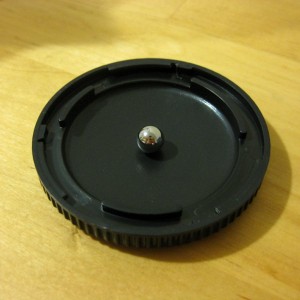
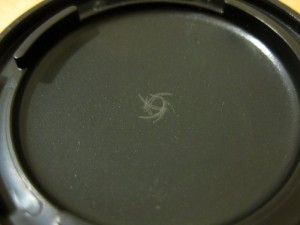
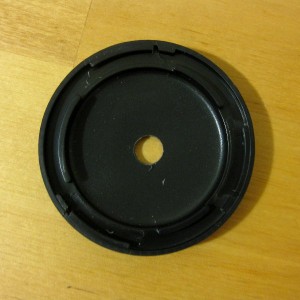
All that is required to finish the project is to tape the piece of aluminum with the pinhole to the inside of the body cap with black tape. You can then twist the body cap onto the camera of your choice and shoot away. You’ll need to take a light reading with a real lens or light meter, then determine the proper exposure using the table above, and set your shutter speed manually. I would also recommend a tripod and using the timer on your camera to minimize camera shake because we generally deal with long exposure times in pinhole photography.
Sample photos will be posted soon.

Woah this weblog is fantastic i love studying your articles. Keep up the great paintings! You understand, a lot of persons are hunting around for this information, you can aid them greatly.